

In recent times, building robust and interactive single-page applications (SPAs) has become necessary if a company wants to attract or retain a customer. One essential aspect of SPAs is seamless navigation between different pages while maintaining a smooth user experience. This in-depth blog will explore how to leverage the React Router library to navigate between pages in your React applications effortlessly. Buckle up, as we embark on a journey to master the art of navigation in React!
1. Understanding React Router
React Router is a widely used library that provides routing capabilities to React applications. It allows users to define routes and navigate between them without needing page reloads. React Router abstracts the complexities of handling URLs and provides a declarative way to define the flow of your application.
When working with React Router, it’s essential to understand its core concepts. One of the key concepts is the Route component, which maps a specific URL path to a corresponding component. By defining routes in your application, you can create a hierarchical structure and determine which components should render based on the URL.
In addition to routes, React Router also offers various navigation components, such as Link and NavLink, which provide a seamless way to navigate between different pages. These components automatically update the URL and trigger the rendering of the corresponding component, resulting in a smooth and interactive user experience.
2. Setting Up React Router
To get started with React Router, let’s install the necessary packages. Open your terminal and run the following command:

Once the installation is complete, we can proceed with the basic configuration. In your main application file, typically “index.js”, import the necessary components as follows:

3. Navigating with Link and NavLink in React Router
React Router provides two components, ‘Link’ and ‘NavLink’, to create navigation links within your application. Let’s take a look at how they work:
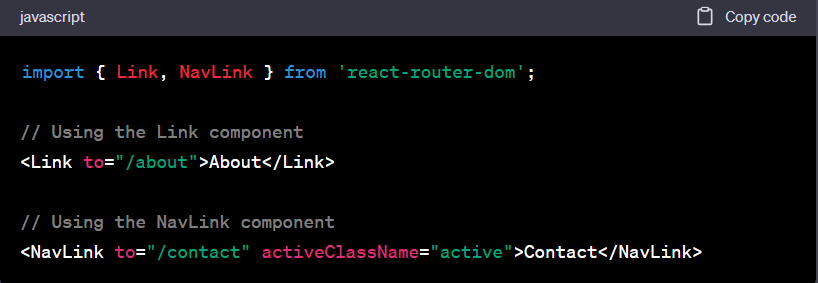
The ‘Link’ component allows us to create links that navigate to specific routes. The ‘to’ prop specifies the target URL. Similarly, the ‘NavLink’ component works the same way but provides additional styling options. The ‘activeClassName’ prop allows us to apply a specific class to the active link, enabling us to style it differently.
4. Route Parameters and Dynamic URLs
In many cases, we need to handle dynamic segments in our URLs, such as user profiles or product pages. React Router allows us to define dynamic routes using route parameters. Let’s see how it works:

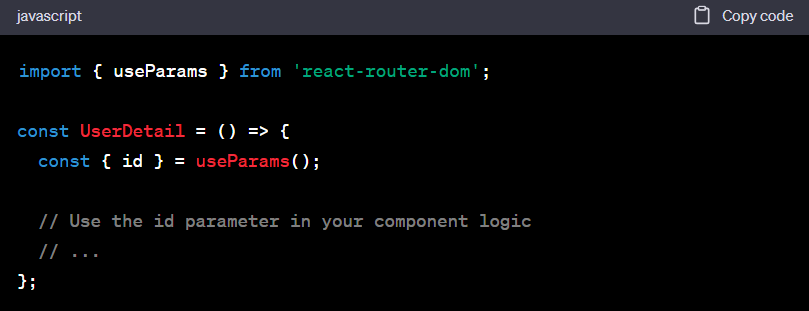
In the example above, the ‘:id’ part in the path is a parameter that can be accessed within the ‘UserDetail’ component. We can extract the parameter using the ‘useParams’ hook:
5. Nested Routing and Layouts
React Router supports nested routing, allowing us to create complex page hierarchies. We can define child routes within parent routes to handle sub-components. Let’s take a look at an example:
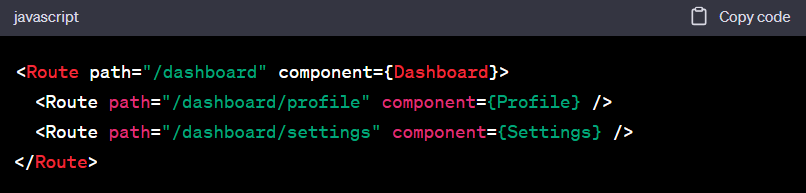
In the example above, the ‘Dashboard’ component acts as the parent route, and the ‘Profile’ and ‘Settings’ components are nested within it. This enables us to render different components based on the URL.
6. Programmatic Navigation
React Router provides the ‘usehistory’ hook and the ‘history’ object to navigate programmatically within your application. Here’s an example:

7. Route Guards and Authentication
In real-world applications, it’s crucial to implement route guards to control access to certain pages based on authentication or user roles. React Router provides a mechanism to protect routes using the ‘Route’ component and custom logic. Let’s explore how to implement a basic route guard.
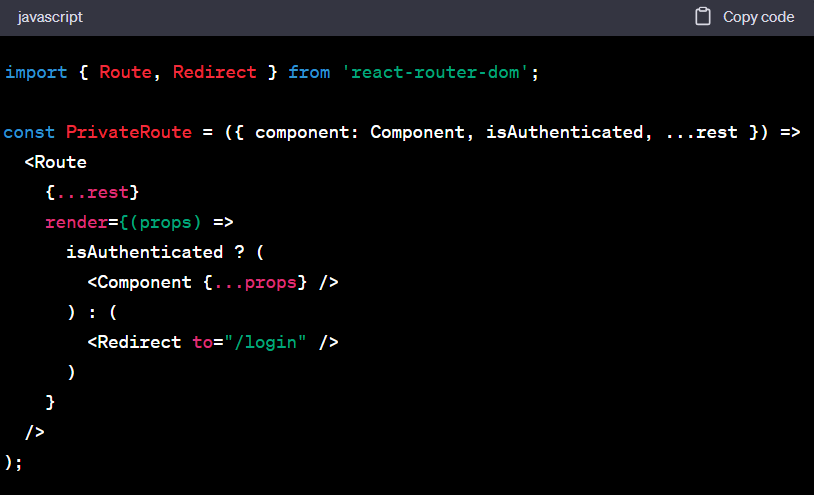
The ‘PrivateRoute’ component acts as a wrapper around the standard ‘Route’ component. It checks if the user is authenticated and renders either the specified component or redirects them to the login page.
Now, you can protect your routes by using the ‘PrivateRoute’ component instead of the regular ‘Route’ component:
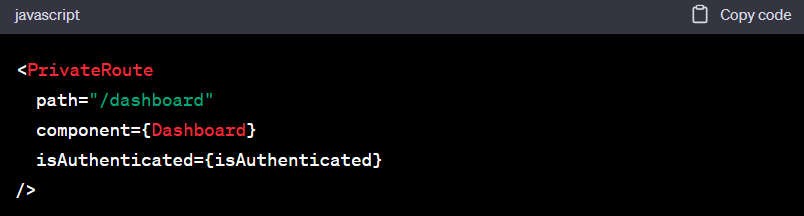
This ensures that only authenticated users can access the dashboard route, while others are redirected to the login page.
Conclusion:
Congratulations on mastering the art of leveraging React Router to create seamless navigation within your single-page applications! You’ve delved into the fundamental concepts, from setting up React Router to handling dynamic routes and implementing nested routing. With these powerful tools, you’re now equipped to build exceptional user experiences.
At Deqode, we understand the significance of React Router and its pivotal role in creating flawless navigation experiences. Our team of experienced developers specializes in harnessing the power of React and its extensive ecosystem to deliver innovative and user-centric applications.
By partnering with Deqode, you gain access to our deep knowledge and expertise in React development. We not only excel in implementing React Router’s advanced features but also prioritize security and authentication to protect your valuable data and ensure a seamless user experience.
Contact us today and embark on a transformative journey to elevate your digital presence and achieve unparalleled growth.
 Software?")


