EOSIO is a blockchain protocol powered by its native cryptocurrency EOS. The protocol emulates most of the attributes of a real computer including hardware (CPU(s) and GPU(s) for processing, local/ RAM memory, hard-disk storage) with the computing resources distributed equally among EOS cryptocurrency holders. EOSIO operates as a smart contract platform and decentralized operating system intended for the deployment of industrial-scale decentralized applications through a decentralized autonomous corporation model.
EOSIO is an open source blockchain protocol. So, individuals and organizations can use it to set up their own blockchain networks.

The first step is to clone eosio from https://github.com/EOSIO/eos with –recursive flag.
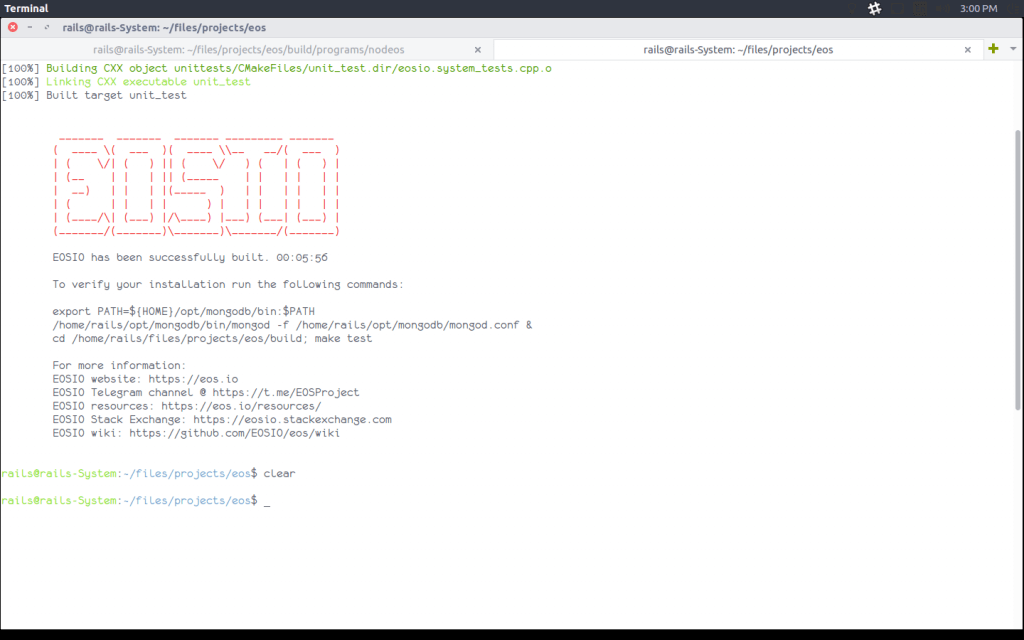
Now, we’ll build EOSIO. EOSIO community gives an automated build script for the following environments:
- Amazon 2017.09 and higher
- Centos 7
- Fedora 25 and higher (Fedora 27 recommended)
- Mint 18
- Ubuntu 16.04 (Ubuntu 16.10 recommended)
- Ubuntu 18.04
- MacOS Darwin 10.12 and higher (MacOS 10.13.x recommended)
EOSIOCPP
for the compilation of the smart contracts.
A detour to .wasm
- Designed as a portable target, high-level languages like C/C++/Rust use
Wasm for compilation. It enables deployment on the web for client and server applications. - Secondly, it enables executing code nearly as fast as running native machine code.
- Thirdly, it speeds up the performance of critical parts of web applications by complementing JavaScript, and so, enables web development in languages other than JavaScript.
- Engineers from Mozilla, Microsoft, Google, and Apple develop Wasm at the World Wide Web Consortium (W3C).
Click here to find out more about Wasm.
EOSIO smart contracts – a brief overview
If you have clicked on this article, you probably know a bit about smart contracts, but let us quickly establish a definition to proceed. Smart contracts are self-executing contracts. Here the buyer and seller ‘code’ the terms of the agreement on
There are a couple of preliminary things that need to be carried on before we jump on the deploying our escrow smart contract. The official documentation page for EOSIO has this in a very clear and precise manner.
Suggested reading: Multi-Node Setup and Smart Contracts in Graphene
Escrow Smart Contract
An escrow is basically a buffer where the token (currency) involved in the transaction is temporarily held. It is held till we know that the transaction can be completed without dispute. So here, the operation under focus for this article is
First, define the class for your smart contract in the header file.
Now, all the member functions corresponding to the actions should be made public. The .abi file of the smart contracts should have their declaration.
Since our
Tables:
The two tables defined are accounts and stat. Firstly, different account objects make up the accounts table. Each
According to the ‘eosio::multi_index’ definitions, code is the name of the account which has write permission and thescope is the account where the data gets stored.
Scope
The scope is essentially a way to compartmentalize data in a contract so that it is only accessible within a defined space. The accounts table uses EOSIO account as the scope of the token contract The accounts table is a multi-index container which holds multiple account objects. Token symbol indexes every account object which contains the token balance. When you query a users’ accounts table using their scope it returns a list of all the tokens that the user has an existing balance.
This is our smart contract’s header file.
.cpp implementation
The .cpp source file has the actions implemented. Definition of our estransfer action starts off with some assertion checks:
Firstly, we assert checks if the sender and receiver accounts are not same, then we check that the transaction has an authority of the sender, authority for a transaction can be specified by using -p flag with cleos.
Next, we fetch the table corresponding to the current token.
These lines notify the specified accounts after a successful transaction
A few more checks follow this:
Finally, we call the two most important utility functions, add_balance, and sub_balance, the former adds the tokens to a specified account and the later deducts it.
Let’s look at sub_balance in a little more detail
First, we fetch the table of accounts objects, the account
Here is our escrow.
So, this is the structure of the ABI file that documents the actions of the smart contract.
Here is the escrow.abi file:
Working with our escrow smart contract using cleos (command line utility as provided by EOSIO).
First, we need to set the contract and create a token

Now, we can check at the moment if any account has some token balance for the token we just created, and the result should not surprise you.

Post the setting of escrow smart contract and the creation of token balance, we can push the action for issuing this token to some user “ned”.

Finally, when we check the account for “ned” we can see the token balance for this account

We are in a situation to transfer funds from “ned” to “jon” (R+L=J)

Now, we have used the account “escrow” with which we had deployed the smart contract as our Escrow for this transaction.
Then, we can check the balance for “escrow”

Finally, this is the final table structure after pushing the release action.

That’s the end of this tutorial. For any doubts, please email the author at aktiwari@deqode.com. For developing an application based on
Must read: Understanding Blockchain, Its Scalability Issues, and their Solutions
References
One stop developer’s doc: https://developers.eos.io/
Resource for pushing actions using


